Showing posts with label Ficcare. Show all posts

Thursday, February 5, 2015

Arwen Butterfly Ficcares: Riding Brooch and Coronation Crown


I've been so eager to show you our latest Lord of the Rings inspired Ficcares! Previously we had our Lothlorien Leaf, Sang of Leaves, and Evenstar Ficcares:
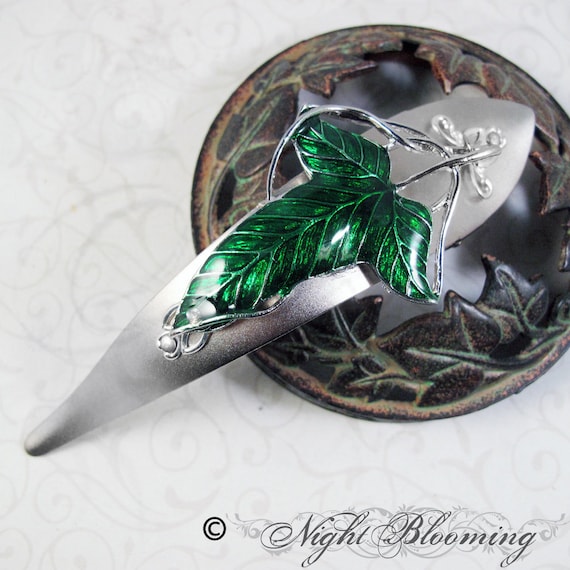
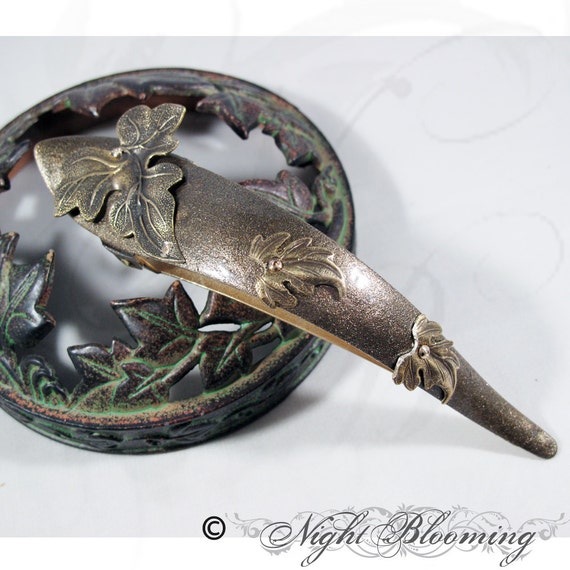
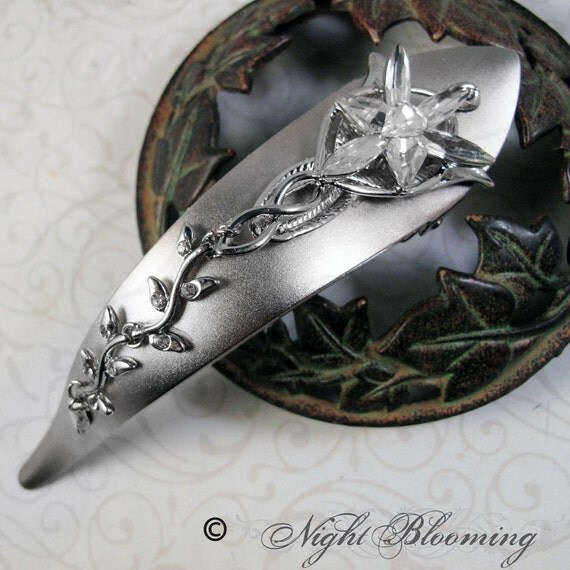
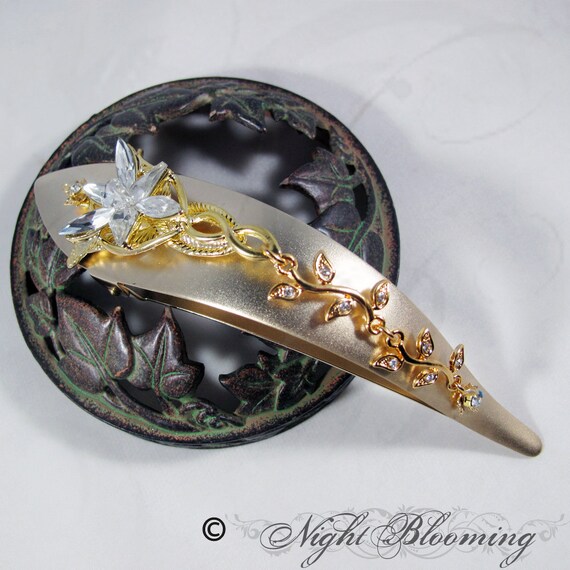


Joining them are two new clips, each inspired by Arwen Undómiel. Arwen Undómiel is a character in J. R. R. Tolkien's legendarium. She appears in his best-known novel, The Lord of the Rings, usually published in three volumes. Arwen is one of the Half-elven who lived during the Third Age.

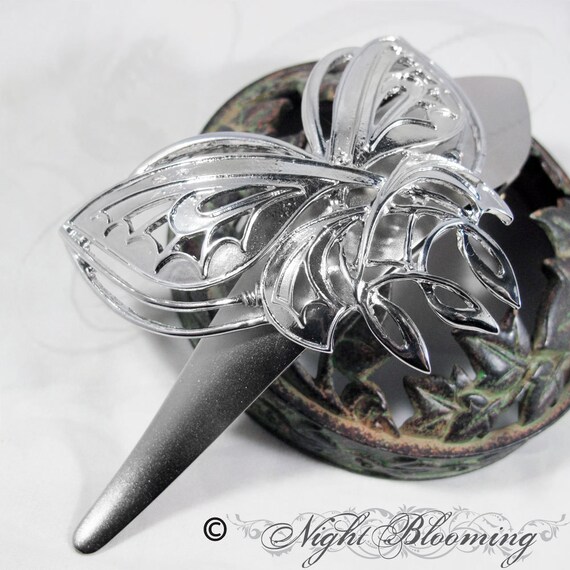
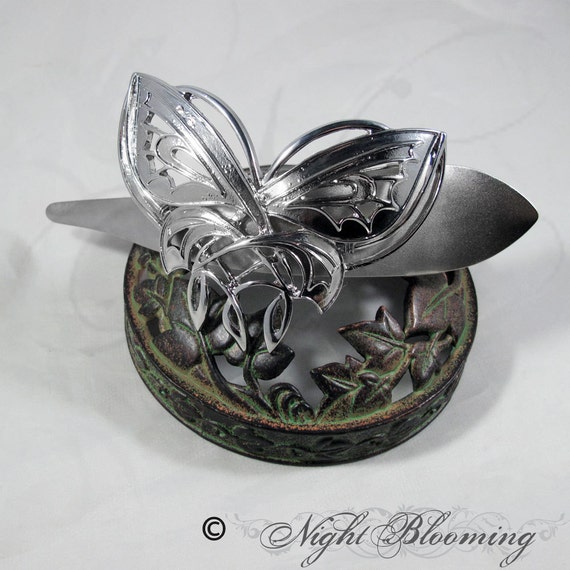
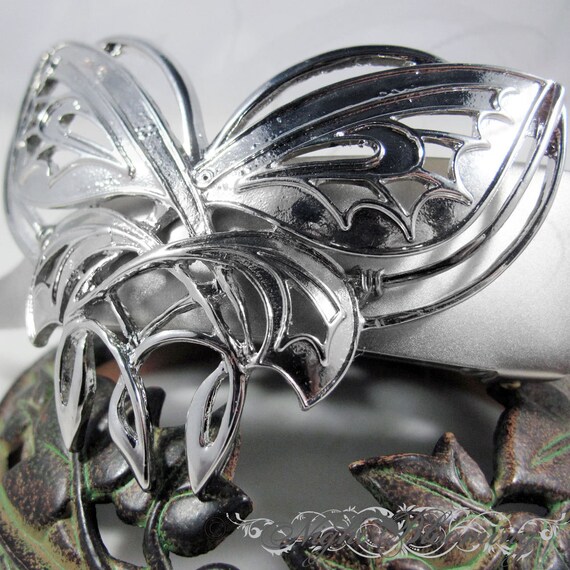
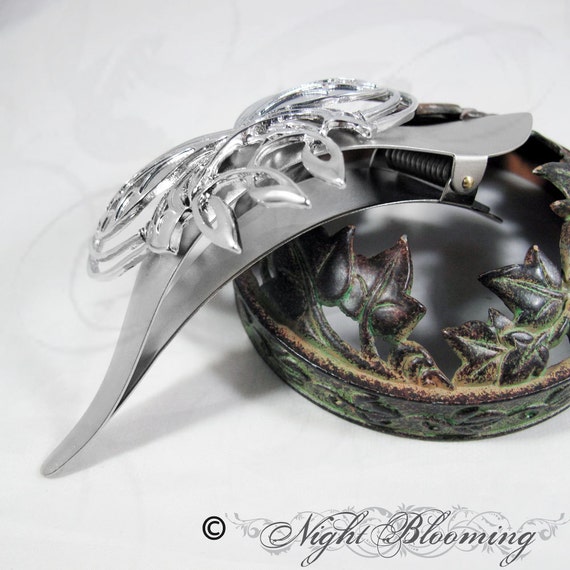
Arwen's Riding Brooch Large Ficcare Hair Clip $105


Etsy Listing

In Lord of the Rings, the Fellowship of the Ring, when Arwen defeats the Ringwraiths after crossing the river, the words she speaks in that scene translate into English thus: “Waters of the Misty Mountains, hear the word of power, rush, waters of Bruinen (Loudwater), against the Ringwraiths!” (Nîn o Chithaeglir lasto beth daer; rimmo nín Bruinen dan in Ulaer!)

This butterfly brooch clasped her riding cloak shut, and now adorns a hair clip fitting for an elven princess.

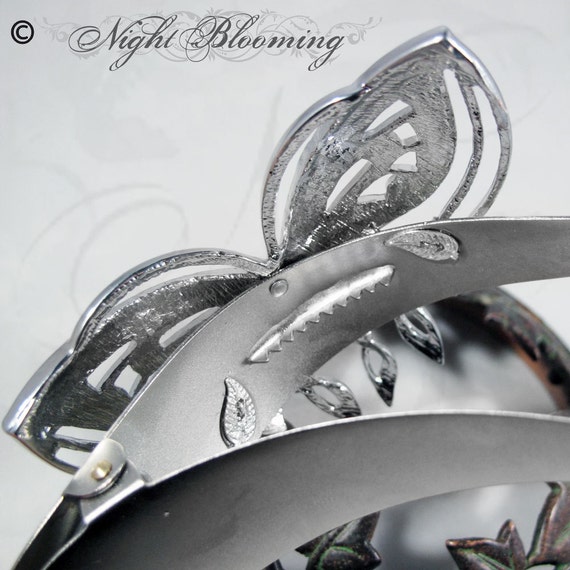
The Ficcare is a brand new size Large (5 inches from tip to tip). A silver Elvish knotwork butterfly is riveted and wired with sterling silver wire to the clip. Silver leaf accents grace the attachment points, and are cased in Ice Resin making them smooth and seamless so as not to snag hair.

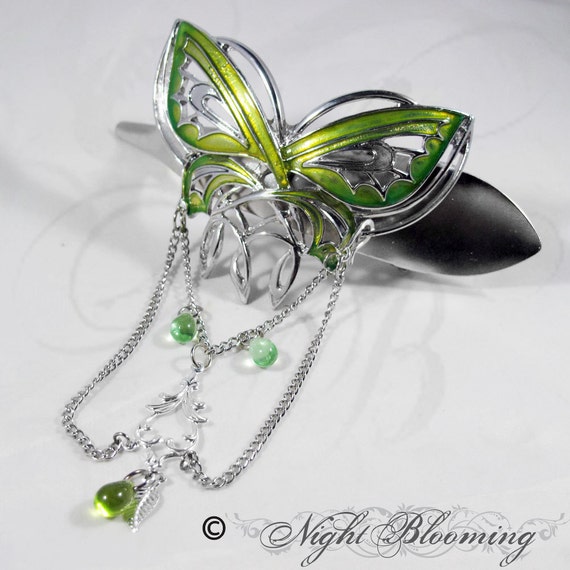
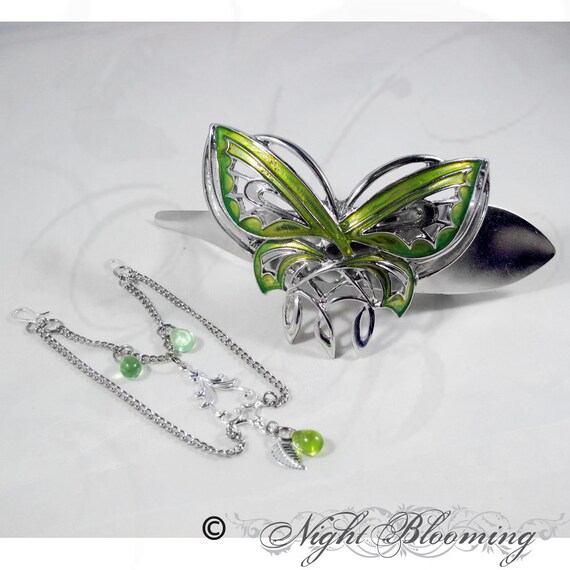

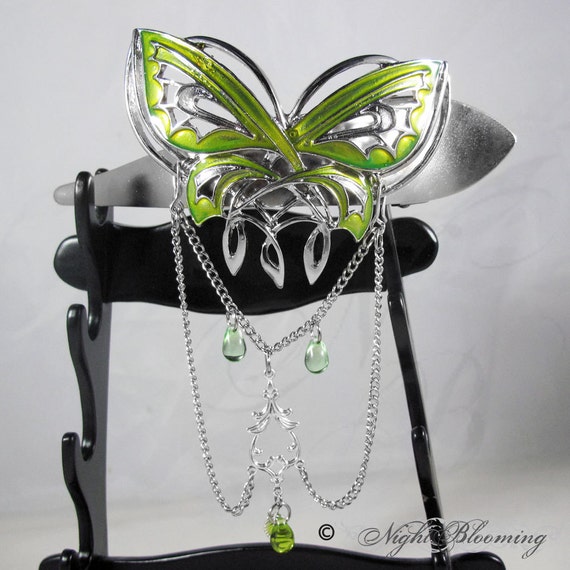
Arwen's Coronation Butterfly Crown Ficcare Hair Clip Large $155


Arwen Undómiel shall not diminish her life's grace for less cause. She shall not be the bride of any Man less than the King of both Gondor and Arnor. - Elrond to Aragorn - J.R.R. Tolkien 

Arwen, known also to her people as Evenstar because of her unparalleled beauty, is destined to leave Middle-earth and sail to the Undying Lands of the West. While this fate looms before her, she falls in love with Aragorn, a mortal man, and is then faced with the heart-wrenching choice to leave Middle-earth with her people or forgo her immortality for the man she loves. She chooses love, and wears a stunning butterfly crown when she takes Aragorn's side in the Return of the King.

This customized Ficcare is wrought blends her Riding Brooch with the green and silver drapes of her Butterfly Coronation Crown.

The Ficcare is a brand new size Large (5 inches from tip to tip). A silver Elvish knotwork butterfly is riveted and wired with sterling silver wire to the clip. The green of the butterfly is hand-painted enamel, sealed with shimmering Ice Resin. Silver leaf accents grace the attachment points, and are cased in Ice Resin making them smooth and seamless so as not to snag hair.

A removable drape hooks onto the edges of the butterfly, with three lengths of silver chain draping to an elvish silver metal filigree in the center. Two sea green glass droplets and one olivine green glass droplet add flashing bits of color to the drape.

________

I hope you love our new designs as much as I do!  There's only a few in the shop, but a custom order, on any size Ficcare, is always an option.


Thursday, November 20, 2014

Winter Bees

Winter Bees

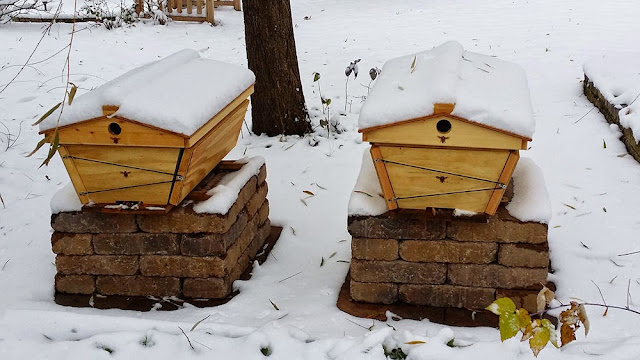
It's been a busy fall (it always is).  There's herbs to collect, a billion leaves to rank and turn into leaf mulch, a garden to pull out, and now, bees to prepare for winter.  The bees are all settled in.  We've given the apiaries insulating roofs and insulation panels to help keep them warm. Inside, the bees will form a tight cluster around the queen, shivering their wing muscles to keep one another warm.  Think of how penguins in the Antarctic form one large group, taking turns on the outside and then moving back into the group to warm up.  Bees do something similar, and this cluster moves slowly through the hive in the winter, the bees on the outside of the cluster picking up honey and feeding it inwards.

They'll be dormant probably until sometime in April, and I worry.  I know people in Alaska keep bees, but still, the winters are very cold and long.  Hopefully they'll be okay!

We also acquired a new honey jar for the house.  It's small, which is awesome as I try to use it sparingly, but also fits perfectly in the pantry.


The reviews on it often complain about it being messy, but I haven't had an issue with it.  I just let the honey drizzle back into the jar until it stops for a second, then move the wand over the lip of the jar. 

Ficcare Update

I've got updates on the Primavara Project coming, so sit tight :)  It's just been super-busy, but I'm plugging away!


Friday, September 5, 2014

Silver Strike Ficcare Repair

I had a lovely customer (who said it was okay to post about this) send me a Small Silver Strike Ficcare where the enamel had broken off the tip:


She wanted to know if, perhaps, I could decorate it somehow and cover up the end.  But the more I looked at it the more I thought I could actually just repair it.  I asked if I could try, and my customer agreed to let me have at and see how it went.

Here's a few more pictures of how it looked before I got started:


The biggest challenge was the height difference.  It wouldn't be enough just to paint silver and black streaks on the metal because the enamel itself is thick so there'd still be a ridge.  You can see that ridge pretty well here, where I've put a primer coat on the bare metal:


From there I started with painting over the primer with black, and then adding in some silver streaks.  It wasn't looking super-promising at this point, but it wasn't bad enough for me to give up, either.


Over top of this I put a coat of ice resin.  Once that had dried I dry-brushed on more silver and black streaks, taking care to match the angle of the ones on the existing enamel.  It was starting to look like something and the height difference had diminished a bit.
 
 
Five layers of ive resin and paint later, the ridge had been nearly evened out:


Then I brushed up over the existing enamel a bit to blend it better and then gave it two more ice resin coats to make the entire surface uniform.  And here's how it turned out!  I'm very pleased with it, and don't think you'd be able to tell it had been repaired even if you had it in your hands:


Monday, August 11, 2014

Making a Primavera Part 2: Icy Resin Coat

While waiting for my art metal clay to arrive I was thinking two things
  1. that if I do get the art metal clay to work, it'll be REALLY expensive to do per clip.  Roughly, I think I'll need 20g of silver metal clay per clip, which is $60 + shipping on top of a $44 clip.  So that's already clearing $100 in materials, to say nothing of time, consumables and whatever else that'll entail.  And that's assuming it works at all
  2. I was really antsy to try out my new mold.
When I coat the the other Ficcares I make I use a compouned called Ice Resin.  It takes 8-13 hours to set and 3 days to cure.  It's a pain to work with, but dries crystal-clear, hard, and doesn't yellow.   I wondered, since metal clay will shrink when I fire it, if perhaps I could make an Ice Resin topper that I could then epoxy down / paint silver (not sure which order is best yet). 

So while I was working on a bunch of custom orders on Saturday I mixed up some Ice Resin and loaded it into the mold.  Because it takes so flipping long to set I had to keep tilting the mold back and forth to distrbute the resin as it set up.  Thankfully the longer this went on the thicker it got, and the less I had to tip. 

But here we were:


It was very thin and I took it out carefully, mostly worried I'd ruined the mold that had taken so long to make.

 
And then set it atop a blank clip I had to finish curing.


It still needs to finish the curing process, but it's hardening up nicely.  Then I can clean up the edges and see what there is to see.  As it stands, though, I do think it's pretty this way.  It has a frosted glass look to it that I think has a unique amount of depth to it.
 
I'm not sure about the best way to paint it silver and then secure it down on a clip.  An antiqued/colored look might be best because I think I'm going to lose the textured recesses with a bit of primer and paint.  But we'll see.
 
In any event, this is shaping up to be a much more cost-reasonable approach than the silver art clay, and at least let me prove to myself that my mold works as desired!

Friday, August 8, 2014

Making a Primavera Ficcare Part 1: Making the Mold

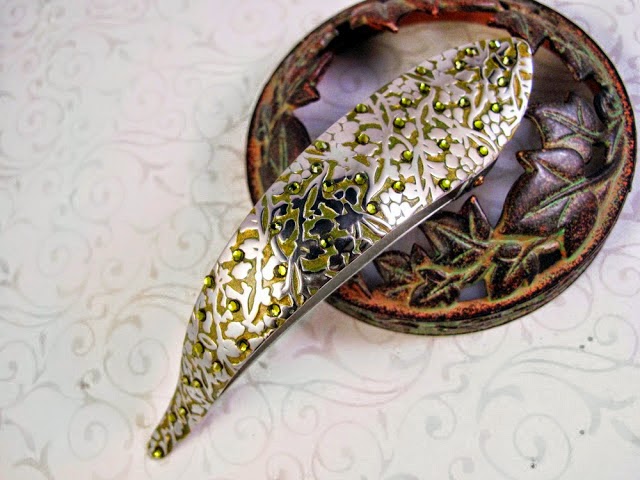
The Primavera collection from Ficcare is my long-standing favorite.  I'm lucky enough to have a few, three, specifically, one silver, one silver where I blackened the recesses, and one silver that I gave an olivine enamel and crystal treatment to:

 
Sadly, they stopped making these clips years ago and they're very hard to come by.  So I wondered, could I make a Primavera top that I could rivet down atop a blank matte Ficcare, thereby giving it a Primavera finish?
 
Here's my plan:
    • Make a mold of a Primavera
    • Use art Metal Clay to create the patterned top
    • Rivet the metal patterned top down on a blank clip

I have no idea if this will work, but can't hurt to try, right? :) 
 

Making a Mold

The first step was to make a mold.  To do this I had to take a reverse-casting of an existing clip.  After a bit of research I settled on a composite mold compound.  The short version is that you melt it down, cast something and then can use that to make replicas.  You can watch a video of how it works here.


It was a little unnerving knowing I was going to pour hot resin over a fairly valuable hair clip, so I did my best to protect it.  Using a plastic bag over the lower jaw and taped to the underside of the top of the clip, I was at the very least hoping to keep the goo out of the hinge.


So I had the Ficcare, had the ComposiMold, and then I needed to find a vessel to cast in. I wound up using a craft organizer with one section walled off by a box of toothpics wrapped in a plastic baggie.  This allowed me to set a small size that would enable me to pour the entire clip rather than trying to figure out how to do just the top.  Both the top of the clip and the inside of the casting box were given a mist with mold-release.
 
 
I don't have pictures of me pouring, because I needed to hands to do it, but here it is with liquid resin all over it.  At this point I was REALLY hoping I hadn't ruined the clip.


It wanted to turn over like a fish, so I taped down some sticks to help keep it pushed down in the mold, then went back to my day job and hoped I wouldn't come home to a total mess.


After returning, I carefully eased the block out of its casting box, and lo! It seemed to have taken well.   I also felt the need to make a Jurassic Park joke :P


And then I very, very carefully started extracting the clip from the block.  I had to be careful not to cut the patterned bit I wanted, scratch the clip, or slip and cut myself.  It took over an hour just to cut everthing away.  Thankfully I have very steady hands, prompting my high school biology teacher to say during dissections that I should have been a surgeon.  


AHHH.  So much for that not getting it in the hinge plan!
 
 
Thankfully after several minutes I was able to get it all out.
 
But it worked!  I was able to get the clip out totally unharmed AND had a pattened mold with with to try making a metal clay cast from. 


I've got a fire brick and more clay on the way, so stay tuned for making the metal plate.